Brick Automation / PC full game
Build a brick line that feeds, runs and collects
Treat the line as three separate jobs: get clay into the molds, supply enough power to every powered machine, and give finished bricks a route out. Put molds inside the Clay Hopper’s coverage, connect machine power ports to the same shaft network, then use adjacent conveyor belts or a Work Post set to Gather for collection.
Updated 2026-11-16 · PC full game
A worked riverside example: trace the three handoffs in your own layout. The shown build includes manual clay top-ups.
Follow the route
Keep the material route separate from the power route
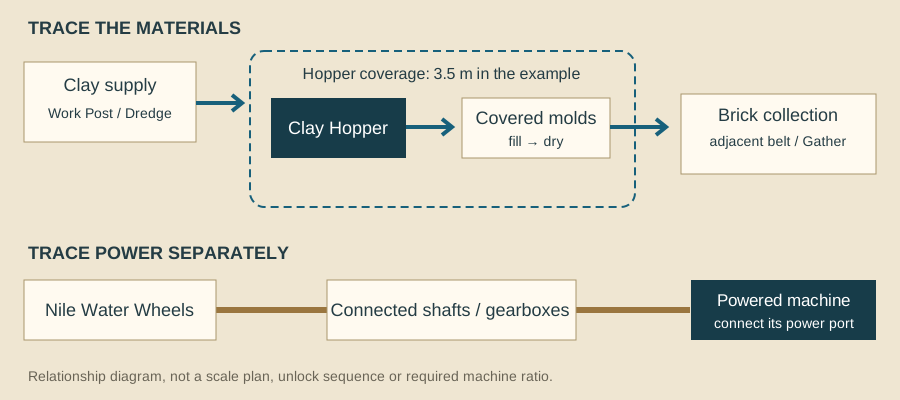
Clay goes from its supply into the hopper and nearby molds; finished bricks leave by conveyor or worker collection. Shafts carry power, not clay or bricks. Follow the two paths separately when you inspect your build.
 Open full-size image ↗
Two routes to inspect separately. The dashed area represents hopper reach, not the footprint or exact placement of this build. This is a relationship diagram, not a scale plan. The two routes to trace Route What to follow What should happen Material Clay supply → hopper → covered molds → adjacent belt or Gather destination Molds fill and dry; finished bricks have somewhere to go. Power Nile Water Wheels → connected shafts / gearboxes → machine power ports The network has enough capacity for the connected load. Place molds within the hopper’s reach
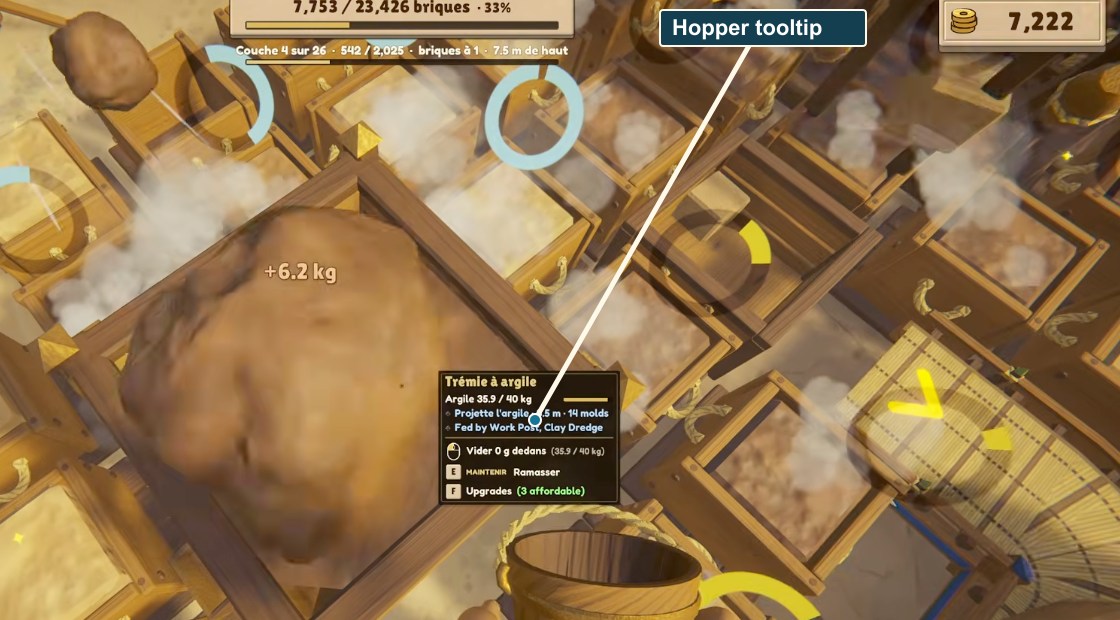
Use the Clay Hopper tooltip to check both its clay stock and how many molds it covers. In this example, the hopper holds up to 40 kg and projects clay over 3.5 m; its tooltip counts 14 molds. Those 14 molds describe this layout, not a required ratio. The tooltip names Work Post and Clay Dredge as supply options. If a mold remains empty, inspect coverage and available clay before adding more power.
 Open full-size image ↗
Hopper readout: 35.9 / 40 kg clay; 3.5 m reach; 14 molds covered in this layout. Read the hopper tooltip Tooltip What the example shows What to check Clay stock 35.9 / 40 kg Supply clay if the hopper is empty. Reach 3.5 m Keep the molds within the hopper’s reach. Covered molds 14 in this layout Use your own tooltip count; 14 is not a required ratio. Join the shaft to the actual machine power port
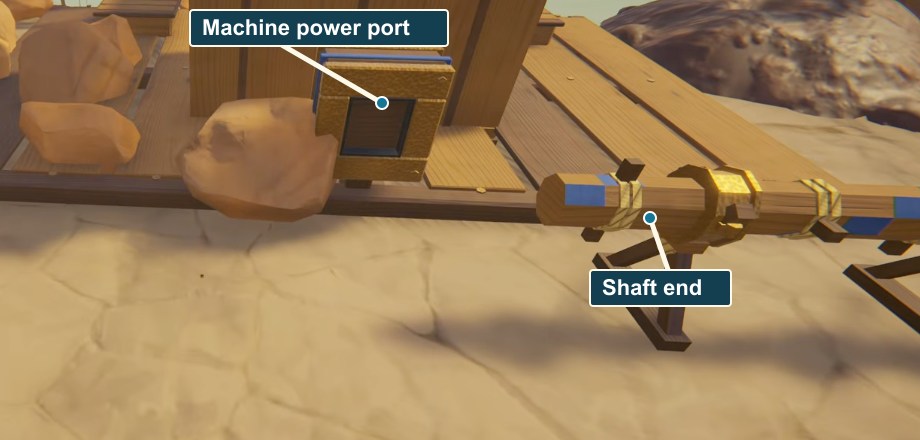
Look for the blue rectangular connector on the powered machine. Bring the shaft line to that connector; placing a shaft nearby is not evidence that the machine has joined the network. Use a Gearbox to turn or branch the route. The in-game Energy description says corners place a Gearbox automatically and a Gearbox can be placed on an existing shaft to make a branch.
 Open full-size image ↗
The blue machine power port and the separate shaft end are marked. Connect the shaft line to the port. Read capacity on the connected network
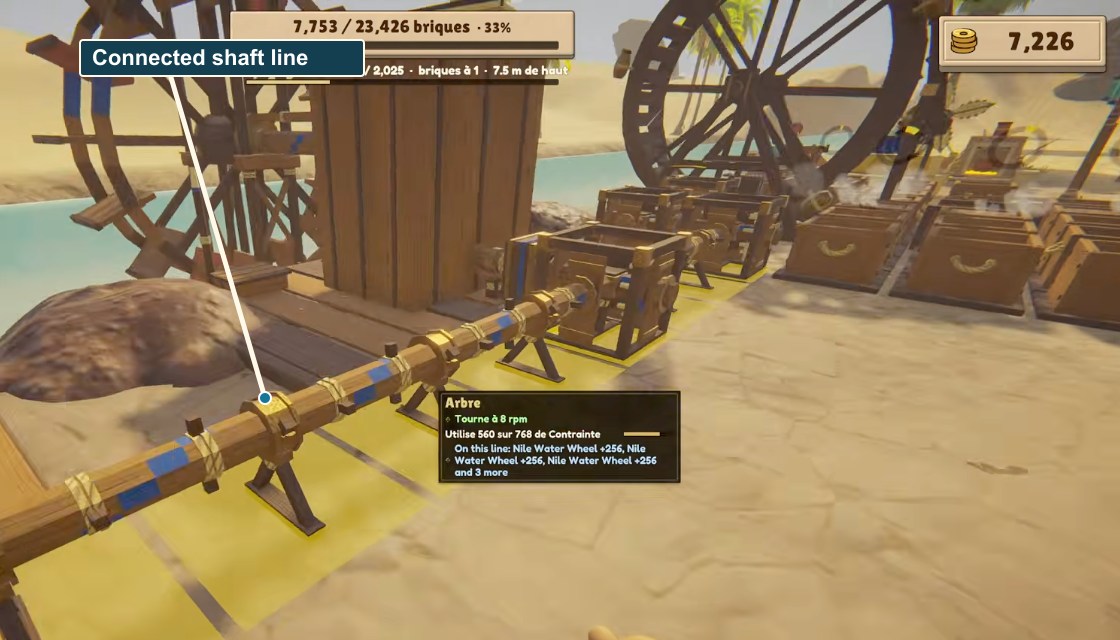
Inspect a shaft or wheel tooltip after connecting the machines. A stopped example needs 560 stress but has only 512 capacity. The later connected network has three Nile Water Wheels, each contributing 256: total capacity 768 against load 560, running at 8 rpm. Add capacity to the same network or reduce its connected load when demand exceeds supply. Three wheels are the example’s solution, not a universal requirement.
 Open full-size image ↗
The connected shaft runs at 8 rpm. Its tooltip lists three water wheels and shows 560 load / 768 capacity. Capacity check in this example State Load Capacity Result Before the connection fix 560 512 Overloaded; stopped. After all three wheels are connected 560 768 Running at 8 rpm. Give finished bricks an exit
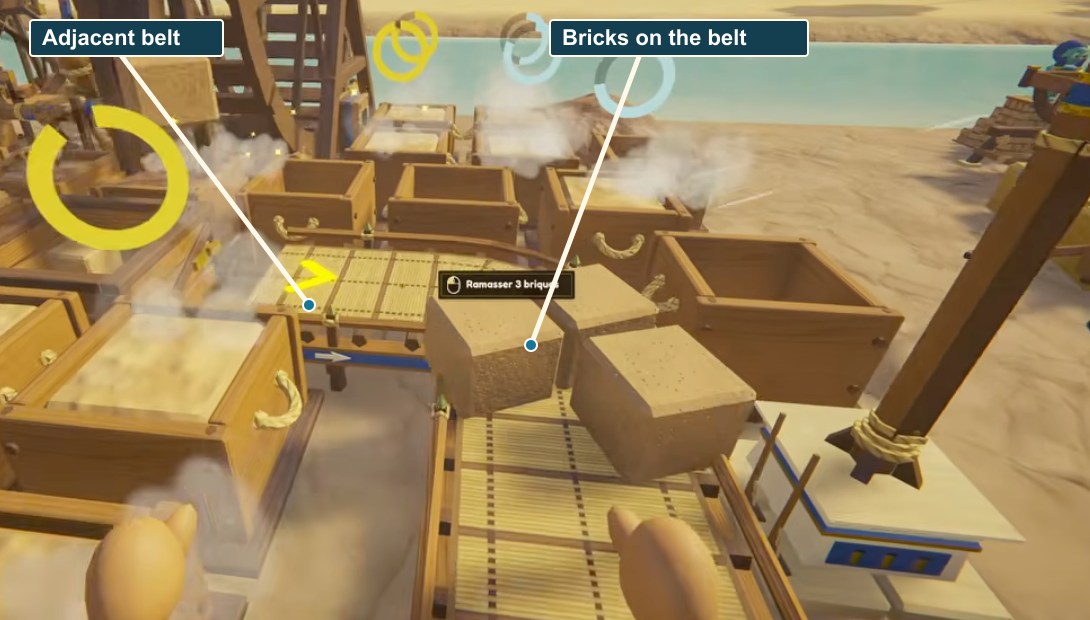
For automatic machine transfer, put conveyor belts next to the machines. For Shabti hauling, use a Work Post and set it to Gather: workers take gathered items to the closest conveyor belt or crate. A nearer crate can therefore receive the bricks you expected on a belt. Inspect the nearby destinations and the belt route before treating an empty belt as a production failure.
 Open full-size image ↗
Finished bricks sit on adjacent conveyor sections beside the molds. Trace this belt route when checking collection.
Success signal
Molds fill and dry, the connected network stays within capacity, and finished bricks reach the intended belt or crate.
Troubleshooting
| Symptom | Check first | Next action |
|---|---|---|
| Molds stay empty | Hopper stock and the covered-mold count | Supply clay and move uncovered molds into range. |
| The power network stops | Connected load versus available stress | Add connected capacity or remove enough load. |
| A machine stays still despite spare capacity | Its actual blue power port and shaft continuity | Reconnect the machine to the network; then recheck the tooltip. |
| Finished bricks do not reach the belt | Machine adjacency or Work Post mode and nearest destination | Put the belt next to the machine, or set Gather and inspect competing crates. |
| Shabti all stop working | Wallet coins for the per-minute ration payment | Restore coins; paying their hiring price does not cover ongoing rations. |
Sources
Gameplay images are cropped and labeled from MacicTV at 62:45–63:35. The video uses French UI and does not show its exact recording build. A held bucket and +6.2 kg at 63:35 show manual assistance; the sample does not establish sustained unattended throughput. Placement and Gather rules are from the developer. This is a working-layout example, not a minimum or optimal machine ratio.